Blueberry Sugar Cookie Sandwiches


The Butterfly Cookie Effect
I can’t believe these are just my second cookie recipe on the blog. I’m not a big cookie eater and Mariana of course can’t eat them either. But I have to admit I have always secretly wished to spend an afternoon decorating perfectly shaped cookies with lots of different colored frostings, even if that would mean abstract creation given my poor painting skills.
For this Valentines Day though, I wanted to finally live my cookie fantasy. I knew that I wouldn’t get the artsy painting part, but at least I could have the rolling and cutting cookie experience.
Given the fact that this would be my first time doing sugar cookies, I wanted to use the popular technique of not chilling the dough before rolling it. A girl just wanna keep things simple for herself, you know. And I have to say I absolutely fell in love with it! It really is convenient and it really works.
If you have never work with cookie dough, or any dough for that matter, you have to learn to trust it, given if it has the right consistency. That means not panicking when you are stretching it and suddenly a piece breaks down, or if the dough starts to crack around the edges. Just treat it like Play-doh; repair it where needed and continue working it.
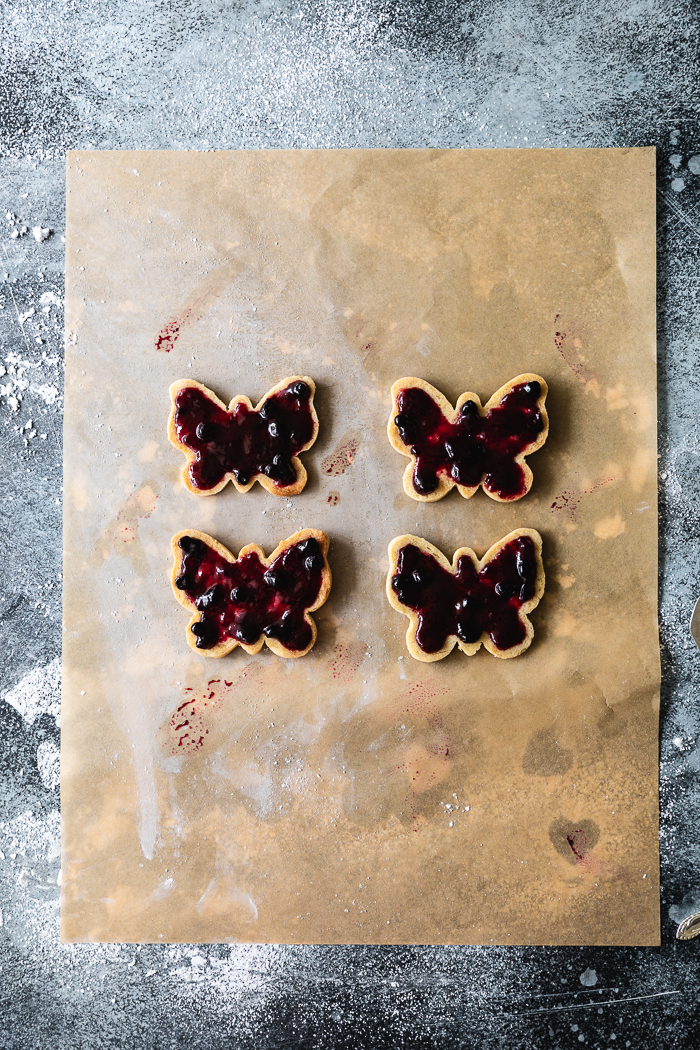
After baked I dusted some powdered sugar on the cookies with the cutouts and spread some blueberry preserves on the other cookies. They were so delicious and I loved the fact that the cookies didn’t turned overly sweet. I need to say it; these cookies flew the plate in no time!
Recipe notes
This recipe is extremely easy. If you see the steps long is because I wanted to give you as much cues as possible. Any kind of dough could be tricky and is more about knowing what you are looking for rather than specific given times.
After beating the dough it should be a bit grainy to the touch but hold together when you press it with your fingers. If you feel it’s not coming together, beat a minute more or add a bit of water and beat again for about a minute and proof it once more.
Flour is KEY! Don’t be afraid to keep flouring your working surface, rolling pin, cookie cutters and hands. That will prevent the dough from sticking and will help the cookies keep its shape when handling.
I recommend using a straight rolling pin to ensure the surface of the cookies are completely flat.
To make this design I cut the dough first with the butterfly cutter and then cut the little heart with another small heart shaped cutter. Cut the same amount of butterflies without the heart to use as the bottom of your sandwiches.
Let the cookies cool completely before decorating. I made these during the night and decorated them the next morning.


Blueberry Sugar Cookie Sandwiches
Ingredients
◯ Butter, at room temperature but not too soft – 2 sticks, (16 TBSP)
◯ Raw sugar – 1 ¼ cup
◯ Egg – 1Baking powder – 1 Tsp
◯ Lemon zest – About 1 Tsp, zest of a small lemon
◯ Pure vanilla extract – 1TBSP
◯ Unbleached all purpose flour – 3 cups
◯ Fine sea salt – ½ Tsp ◯ Powdered sugar to dust top cookies
◯ Blueberry or your favorite fruit spread to fill the cookies
Details
Yield: 14 to 16 sandwiches (about 30 singular cookies)
Total time: 35 to 40 minutes for making the cookies + 15 minutes decorating
Active time: 10 minutes making the dough + 15 minutes decorating the cookies
Equipment: stand mixer or hand electric mixer, baking trays, cooling rack
Steps
In the bowl of a stand mixer put the butter and sugar. Beat the butter and sugar in medium speed (level 4 on the Kitchen Aid) until the mixture looks fluffy and pale, about 5 minutes. Add the egg, baking powder, lemon zest and vanilla. Scrap the butter sugar mixture down the bowl and beat again for 2 minutes.
Scrap down again the bowl if needed. Beat again in low speed (level 1 on the Kitchen Aid), add the salt and start incorporating the flour, one cup at a time. Continue beating for 3 minutes. Stop the mixer and check your dough texture. It should be a bit grainy to the touch but hold together when you press it with your fingers (see notes). Press the whole dough with your hands and divide it into two balls. Press each one a bit to give them a disk form, but don't worry if it’s not completely flat.
Transfer one of the disks to a well-floured surface (see notes) and stretch it with a straight rolling pin until it’s about 1/16” thick. If the dough starts to crack around the edges, press it with your fingers and continue stretching until desire thickness. Stop stretching if there’s a point when the dough cracks immediately after your stick it together and you can’t fix it back. Using your selected cookie cutter cut the dough and place each piece on your baking sheet. Using your hands put together the dough’s borders.
Repeat the whole process with the second ball of dough. To create more cookies, roll out the remaining dough’s borders and repeat the process with it until you cut out the most of the dough.
Place the baking trays in the freezer for 15 to 20 minutes.
In the meantime, preheat oven to 350°.
Bake each cookie tray for 10 minutes, 12 if you prefer a more toasted cookie on the bottom. Retire from oven and wait one minute before placing over a rack with a spatula. Let them cool completely.
If making cookie sandwiches, dust with powdered sugar the cookies with the cutout, spread jelly on the back of the whole cookies and then slightly press the two cookies together to make the sandwich.
